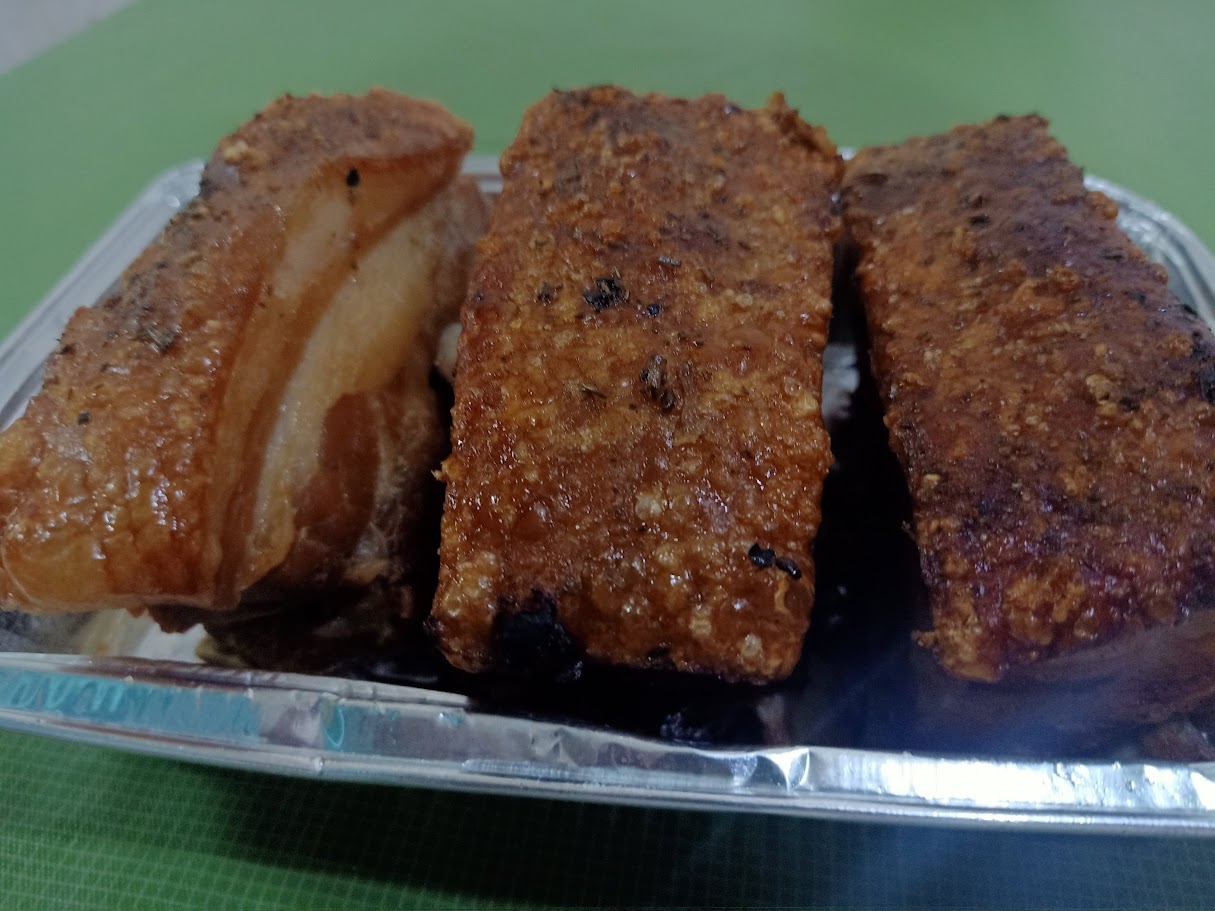
The Crispiest, Most Addictive Fried Pork Belly / Lechon Kawali You’ll Ever Make – Guaranteed!

Crispy Crunchy Porky Goodness: How to Make the Ultimate Fried Pork Belly
As a mom to two little piglets of my own, I’m no stranger to the siren song of crispy fried pork belly aka Lechon Kawali in the Philippines. This savory cut of meat is like comfort food crack – highly addictive with its glorious chew factor and decadent richness. But making perfectly crispy pork belly at home can seem intimidating, what with all that rendering fat and precise timing. Fear not fellow parents! I’m here today to break down the process step-by-step so you too can achieve porky nirvana with ease.
The key is starting with high quality meat. Ask your locally sourced butcher for neatly trimmed slabs of pork belly with a nice layer of fat. Opt for meat raised humanely from small farms whenever possible – the flavor and your conscience will thank you. For this dish, my tatay recommends selecting a thicker piece of pork belly with clear alternating strips of fat and meat. Too thin and it may overcook before crisping up. But avoid choosing one that’s too fatty as well. You want a nice balance where the fat renders out to keep the strips of meat tender and juicy within the crunchy exterior.
To start, you’ll select a nice thick cut of pork belly with rind still intact. Be sure to score the skin in a diagonal hatch pattern without cutting into the juicy bits below. Next, generously season the meat with salt, pepper and some potent crushed garlic. Studded with fragrant bay leaves, the pork belly is then submerged in just enough water to simmer softly until falling-off-the-bone tender.
Once cooled, take care to thoroughly dry the rind. I can’t highlight this enough. DRY THE PORK! This step is crucial for maximum crunch factor later on and so you’ll not have a war in your kitchen later with splattering oil. You might say that this is overkill but been there, done that. I hate getting burned by oil! Sprinkle a few fluff of flour on your pork to ensure there’s no splatter. Not too much, jest enough to suck the moisture.
The prep work is done, now onto the good stuff.
Get your oil heating to 325°F in a heavy bottomed pot or Dutch oven. You want to slowly render the fat while sealing in moisture – too hot and your pork will burn before finishing. Carefully lower the pork skin-side down and watch in awe as it magically transforms into a crisp, golden sheet of crispy awesomeness before your very eyes.
At this stage, all you need do is remain calm yet watchful. Sip some tea or bop around to upbeat tunes to pass the cooking time. Withing 12-15 minutes, the pork belly should turn a lovely golden brown. Resist the urge to fiddle! Carefully flip and continue cooking for another few minutes until the underside crisps up too.
As any self-respecting fried pork enthusiast knows, double frying is truly the way to achieve crispy pork belly nirvana. The double fry, or faan zaa in Chinese cooking, cleverly draws out moisture the first go around to ensure a shatteringly crunchy exterior. But it’s that second hot flash fry at a higher temperature that really seals the deal – transforming the pork skin into an explosive textural triumph.
By double frying for just 30 seconds at a hotter 350°F the second time, any remaining moisture is flash evaporated. This locks in juiciness within while the exterior achieves an unparalleled levels of delicious crackliness. What genius came up with this technique? Clearly a culinary visionary ahead of their time.
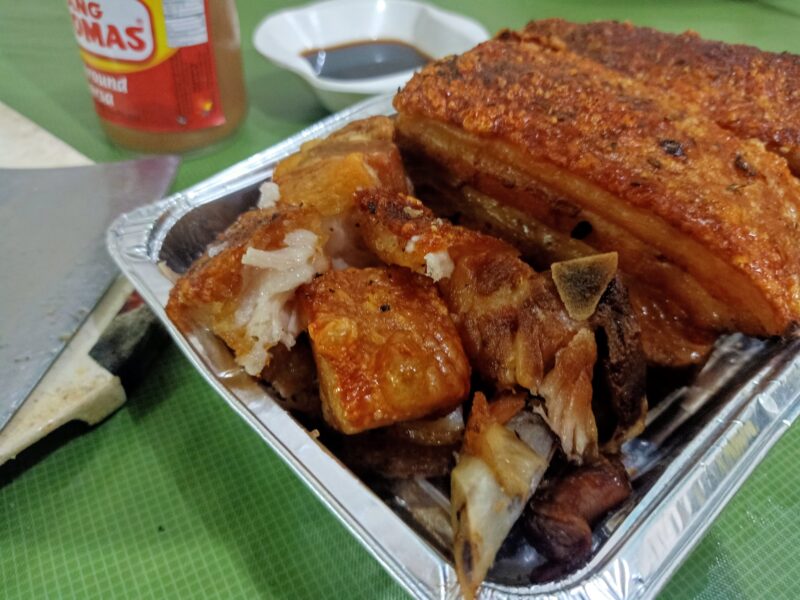
Now transfer cooked pieces to a plate lined with paper towels to drain excess oil. Season immediately with flaky sea salt. Let the pork belly rest before cutting so those juices don’t go squirting all over creation. Slice into pieces with a razor sharp knife and prepare for total piggy party in your mouth!
And there you have it folks – gloriously crispy fried pork belly, perfect for sharing family style or packing in lunch boxes to impress friends. The rendered fat keeps the meat tender within while the light batter lends ideal crunch without. What’s your favorite way to enjoy this crispy goodness? I love mine as a snack all on its own or served over rice with sawsawan of vinegar and soy sauce with onions or Mang Tomas Lechon sauce for an extra pop of flavor. Now pass me that last piece before the little piglets eat it all!
This Filipino classic Lechong Kawali is sure to be a new favorite – guaranteed drool-worthy with each decadent bite. Enjoy alongside steaming rice or make it the star of the show for an easy weeknight meal. Pork out and let me know how it goes.
Be sure to sign up for my monthly newsletter below for more kid-approved recipes straight from my kitchen to yours. And thanks as always for reading!
Warmly,
April
Fried Pork Belly / Lechon Kawali

Ingredients
Shopping List:
- - 1 lb pork belly (ask butcher for thick cut with rind intact)
- - Bay leaves
- - Sea salt
Pantry Staples:
- - garlic (minced)
- - black pepper
- - cooking oil (for frying)
- - soy sauce
- - vinegar
- - onions
- Tools:
- - Heavy bottomed pot or Dutch oven
- - Instant-read thermometer
Instructions
- Score rind in crosshatch pattern, season meat generously with salt, pepper and garlic. Add bay leaves.
- Simmer pork belly in water until very tender, about 1 hour or more -depending on your meat. Remove, cool, refrigerate overnight.
- Dry rind thoroughly. Sprinkle flour to absorb moisture.
- Heat oil to 325°F. Fry pork skin-side down 12-15 minutes until deep golden. Flip and fry a few more minutes.
- Reheat oil to 350°F. Fry pork 30 seconds per side to seal in juices and crisp rind.
- Drain on paper towels, season rind with salt. Slice and serve!
Notes
Nutrition: High in protein and fat but satisfying. Rendered fat keeps meat juicy.
Tips: Double frying is key for max crunch. Drying rind prevents splattering. Use thermometer for proper frying temps.
Variations: Serve with rice, kimchi mayo or soy vinegar dipping sauce. Great as a banchan or in adobo.
Leftovers: Refrigerate 3-4 days or freeze for 2 months. Reheat crisped pieces in air fryer for a quick meal.

